How to Create Your Own Jekyll Theme?

AnonymousOct 11, 2023

In this tutorial, we will learn how to create your own jekyll theme step by step:
Jekyll is an open-source static site generator written in the Ruby programming language.
Getting Setup
Before creating a Jekyll theme, you have at least a basic understanding of Jekyll.
Step 1: First you need to have Ruby installed on your system, If you don't have yet, then you can download it here (WITH DEVKIT).
If you are using "MAC" , then use following command:
brew install rubyTo check the version of Ruby installed on your system:
ruby -vStep 2: Install the jekyll and bundler gems
gem install jekyll bundlerTo check the version of Jekyll and bundler installed on your system:
jekyll -vbundler -vFinally, you’ll need to RubyGems Account — you’ll need these credentials later when you push your theme gem on RubyGems.
Getting Start
Step 3: Create a new Jekyll theme
The jekyll new-theme testingtheme command in Jekyll is used to create a new Jekyll theme scaffold. This command generates the basic structure and required files for a custom Jekyll theme.
jekyll new-theme testingthemeOnce run, you will see created basic folder structure:
create / Volumes / Manpreet / mydata / myprojects / testingtheme / assets
create / Volumes / Manpreet / mydata / myprojects / testingtheme / _layouts
create / Volumes / Manpreet / mydata / myprojects / testingtheme / _includes
create / Volumes / Manpreet / mydata / myprojects / testingtheme / _sass
create / Volumes / Manpreet / mydata / myprojects / testingtheme / _layouts / page.html
create / Volumes / Manpreet / mydata / myprojects / testingtheme / _layouts / post.html
create / Volumes / Manpreet / mydata / myprojects / testingtheme / _layouts /default.html
create / Volumes / Manpreet / mydata / myprojects / testingtheme / Gemfile
create / Volumes / Manpreet / mydata / myprojects / testingtheme / testingtheme.gemspec
create / Volumes / Manpreet / mydata / myprojects / testingtheme / README.md
create / Volumes / Manpreet / mydata / myprojects / testingtheme / LICENSE.txt
initialize / Volumes / Manpreet / mydata / myprojects / testingtheme /.git
create / Volumes / Manpreet / mydata / myprojects / testingtheme /.gitignore
Your new Jekyll theme, testingtheme, is ready for you in /Volumes/Manpreet / mydata / myprojects / testingtheme!
Now You can start working on your theme by customizing and building it to meet your specific design and functionality requirements.
Note: if you want see my theme structure then go to - https://github.com/manpreets99/jekyll-theme
Run the following command to start the Jekyll development server:
bundle exec jekyll serveIf you are face webrick error ,You may fix it by adding webrick to your dependencies:
bundle add webrick
Step 4: Push and Publish Your Jekyll theme gem
After you have completed the design and customization of your theme, the next steps is pushing your theme gem on Ruby Gems.
How to push and publish your theme gem on ruby gems ?
In your theme, you have a testingtheme.gemspec file in root, which contains all the information and build instructions for your gem.
# frozen_string_literal: true

Gem::Specification.new do |spec|
  spec.name          = "testingtheme"
  spec.version       = "0.1"
  spec.authors       = ["your name"]
  spec.email         = ["your mail id"]

  spec.summary       = "Basic Jekyll theme for any type of websites."
  spec.homepage      = "your github repo"
  spec.license       = "MIT"

  spec.files = `git ls-files -z`.split("\x0").select do |f|
    f.match(%r!^(assets|_(data|includes|layouts|sass)/|(LICENSE|README)((\.(txt|md|markdown)|$)))!i)
  end

  spec.add_runtime_dependency "jekyll", "~> 3.9"
  spec.add_development_dependency "bundler"
  spec.add_development_dependency "rake", "~> 12.0"
end
You will edit testingtheme.gemspec file, for adding your information.
Next, You need to signin ruby gems in your terminal:
gem signinIts ask to rubygems credentials which you did use for signup account.
Enter your RubyGems.org credentials.
  Don't have an account yet? Create one at https://rubygems.org/sign_up
Email:
Password:
After adding your credentials , "You have successfully signed"
Next, To build your gem, use the following command
gem buildOnce you’ve run this, a new file will appear in the root of your project - testingtheme-0.1.gem. The file name is represent current version in your .gemspec file. Next, we need to push your gem, use the following command
gem push testingtheme-0.1.gemOnce you’ve run this, Your Jekyll theme gem pushed and published successfully!
PREVIEW THEME - https://testing-theme.netlify.app/
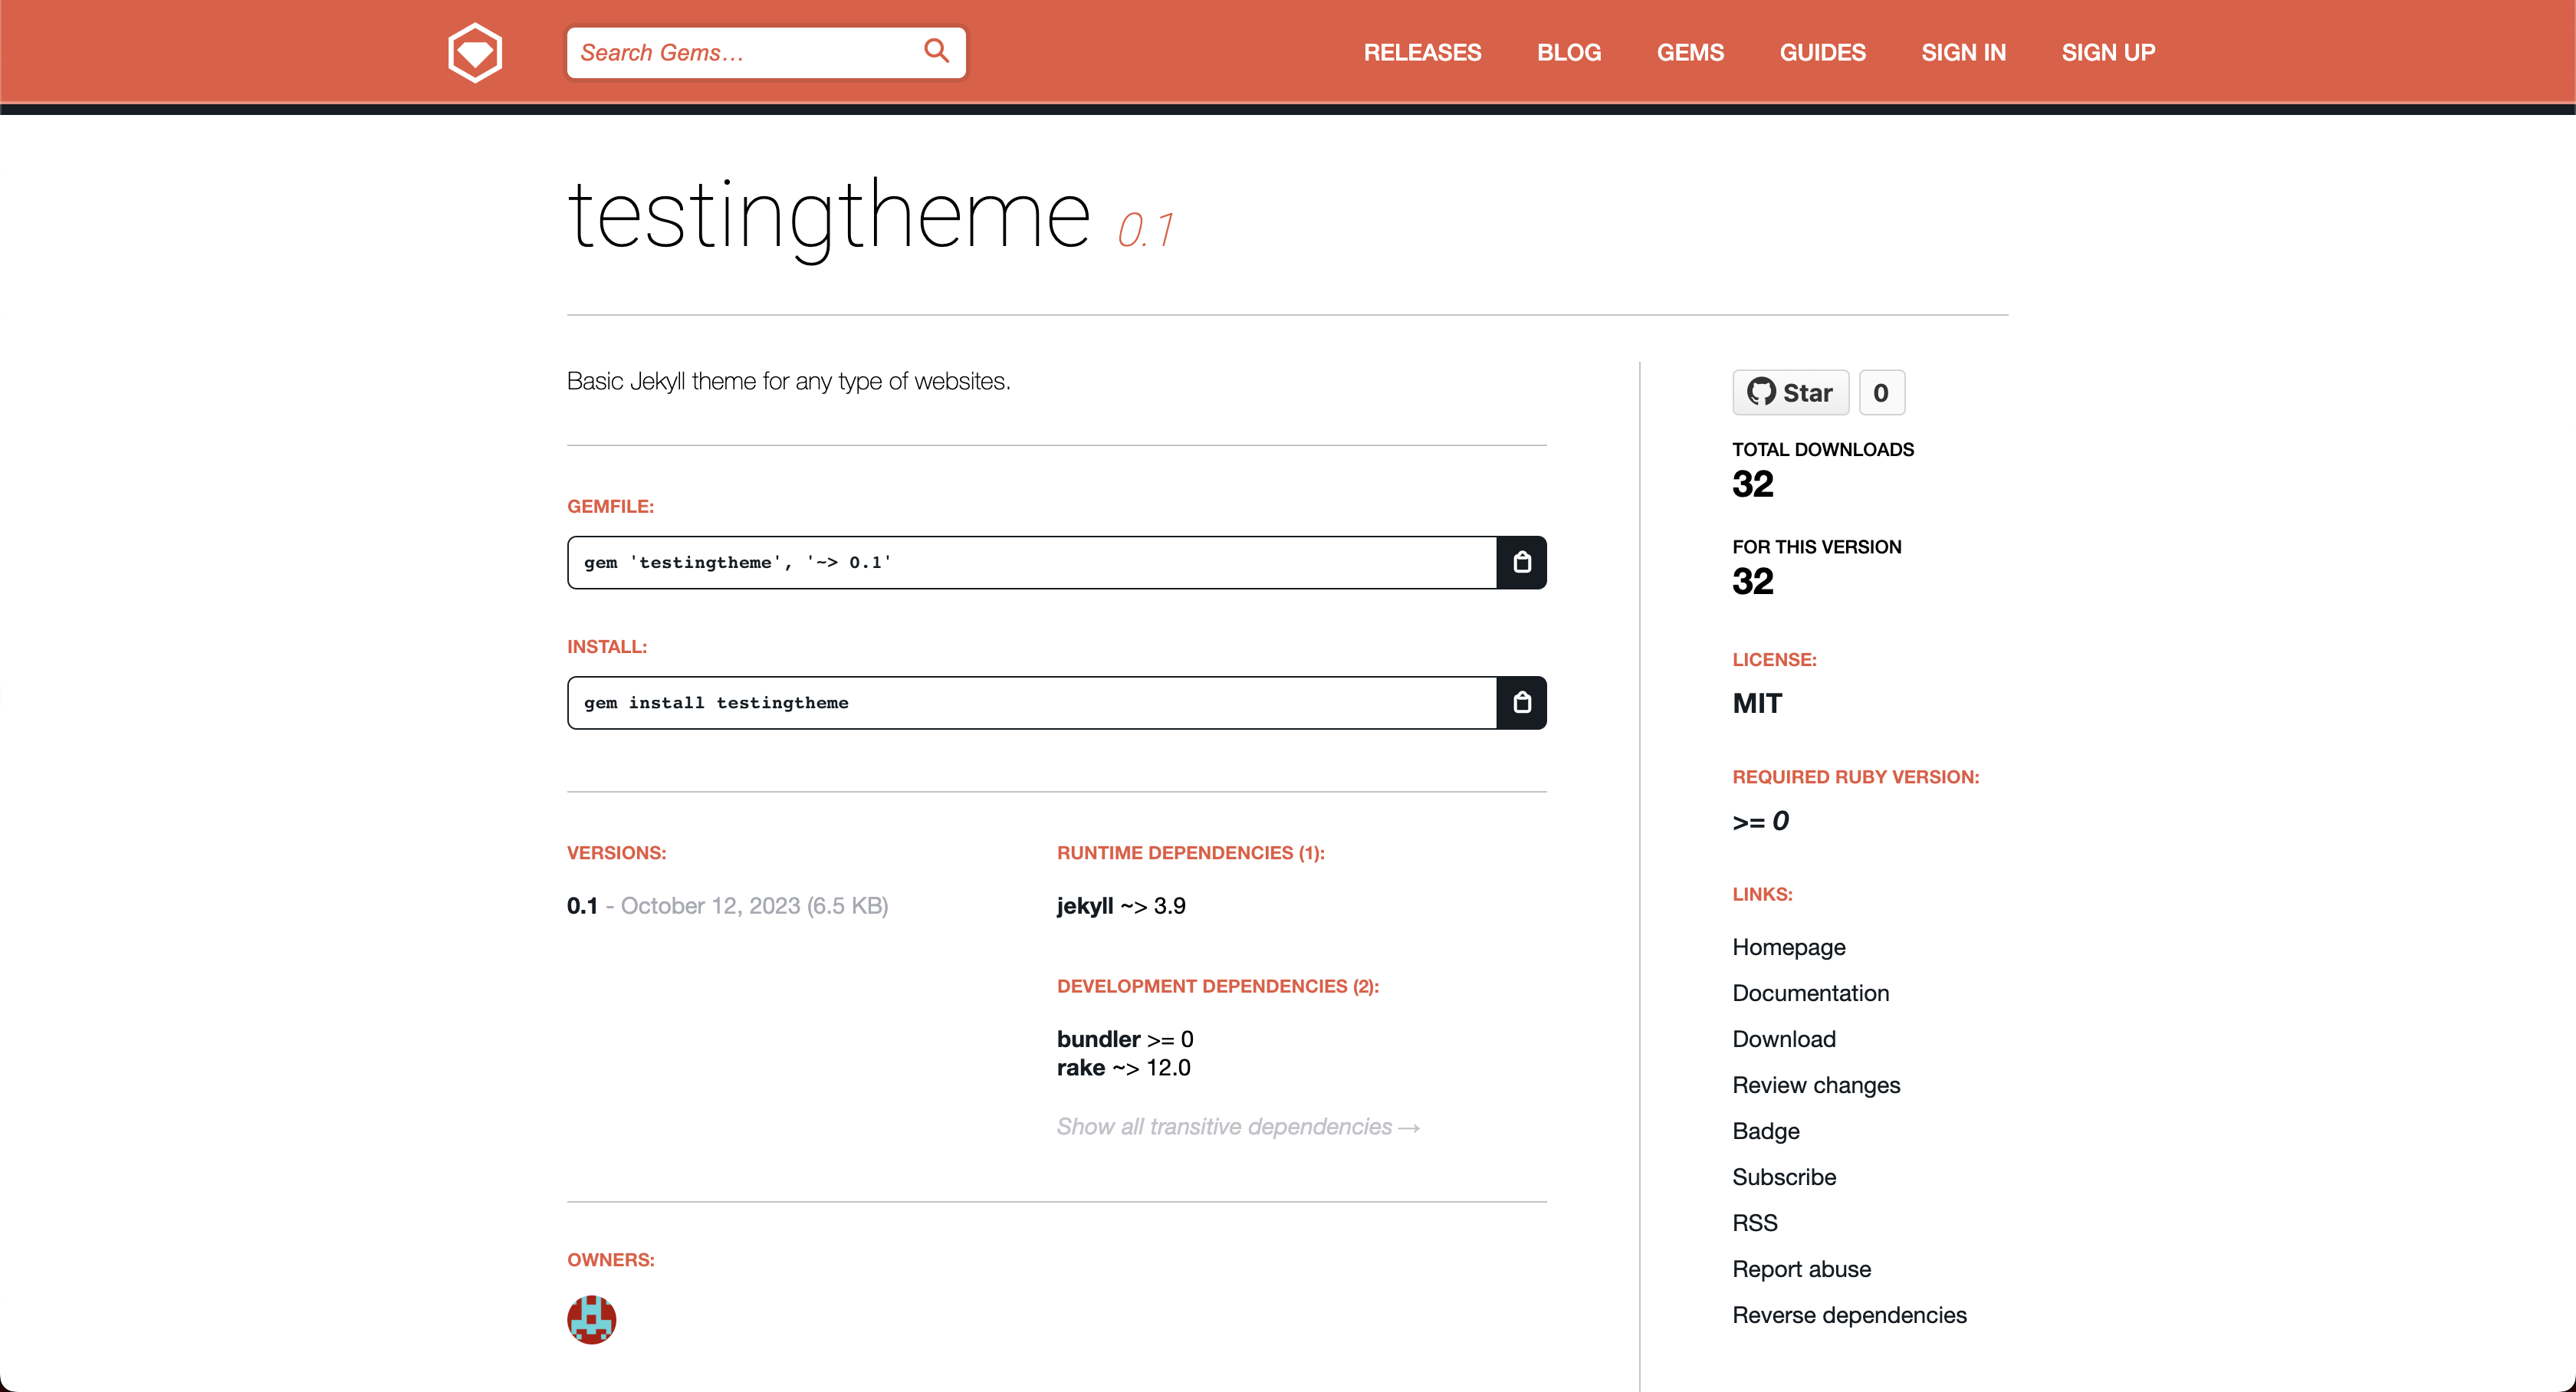
You can also see published jekyll theme on - https://rubygems.org/gems/testingtheme
Step 4: Testing Your Jekyll Theme
How can I use my Jekyll theme in my another jekyll project?
Create a basic Jekyll site
jekyll new mysiteFirst, You will need to add theme gem into your Gemfile:
source "https://rubygems.org"

# jekyll gem
gem "jekyll", "~> 3.4"

# My theme gem
gem 'testingtheme', '~> 0.1'

# plugins which are i am using
group :jekyll_plugins do
  gem "jekyll-sitemap"
  gem "jekyll-paginate"
  gem "jekyll-seo-tag"
end

gem "webrick", "~> 1.8"
The second step is to add the theme name in your _config.yml file:
theme: testingthemeNext, Installing the all dependencies of project:
$ bundle installRun the Jekyll site using this command:
$ bundle exec jekyll buildConclusion
Creating a Jekyll theme to manage multiple projects is a common and practical reason to do so. Using a shared theme for multiple projects offers several advantages:
- Consistency: By using a common Jekyll theme across multiple projects, you ensure a consistent look and feel. This is especially important if you have multiple websites or blogs that should maintain a similar brand identity.
- Efficiency: Developing a single Jekyll theme that serves as a foundation for multiple projects can save a significant amount of time and effort. You only need to design and maintain one theme, which reduces duplication of work.
- Easy Updates: When you need to make updates or improvements to the theme, you can apply these changes to all your projects simultaneously. This ensures that all your websites stay up to date with the latest design elements and features.
- Easier Maintenance: Debugging and maintaining a single Jekyll theme is more straightforward than managing individual themes for each project. It simplifies troubleshooting and makes it easier to identify and fix issues.
- Scalability: As your number of projects grows, using a common Jekyll theme becomes even more valuable. It allows you to scale your web development efforts efficiently without a proportional increase in design and development work.
- Cost-Effective: Creating and maintaining one high-quality theme is often more cost-effective than developing custom themes for each project. It reduces development costs and overhead.
- Cross-Pollination: Sharing a Jekyll theme among projects promotes the cross-pollination of design and functionality ideas. Successful elements from one project can be easily implemented in others, improving the overall quality of your web properties.
- Version Control: You can use version control systems like Git to manage your common Jekyll theme, ensuring that changes are tracked and documented. This simplifies collaboration and version management.
- Rapid Development: When starting a new project, you can kickstart development by simply applying your common theme as a foundation. This accelerates the initial setup and development process.
- Testing and Quality Assurance: You can thoroughly test and optimize your Jekyll theme for performance, security, and compatibility once and then apply these improvements to all your projects, enhancing the overall quality of your websites.
By creating and using a Jekyll theme for multiple projects, you streamline your web development process, maintain a consistent brand image, and make it easier to manage and update your websites over time. This approach is particularly beneficial for web developers, agencies, or organizations with multiple web properties.